
![]()
Please read below to review our printing requirements to ensure that your prints will be to the highest quality possible:
![]()
ACCEPTED FORMATS FOR PRINTING YOUR FILE
Please provide files
in the following formats
(fonts must be in .OTF or .TTF format
or we will not be able to adjust the artwork):
•
EPS or AI should be in CMYK color
mode, 100% in size with crop/cut/fold marks. As an
example, files can be saved from Adobe Illustrator, Adobe
InDesign, or CorelDraw! All EPS files
should have fonts converted to outlines/curves. A minimum bleed of 0.25" is suggested for all
artwork, 0.5" for box artwork.
•
TIF should be in CMYK
color mode, 300 dpi, 100% in size with crop/cut/fold
marks. As an example, files can be saved
from Adobe PhotoShop or Corel PhotoPaint. It is not
recommended to have TIF files with fonts smaller than 8pt.
text for legibility. A minimum bleed of 0.25" is suggested for all
artwork, 0.5" for box artwork.
•
PDF files in
Press Quality. We do accept PDF files, however they
are not always accurate. Please submit with
caution.
 via computer, OR mail your files on disc
(include all
logos, photos and fonts [.OTF or .TTF] necessary).
via computer, OR mail your files on disc
(include all
logos, photos and fonts [.OTF or .TTF] necessary).
NOTE:
- For a 20"x20" game board print the artwork live
area should be 19.75"x19.75" for
bi-fold (STYLE 2) or quad-fold (STYLE 1). For a 30"x20" game board print the artwork live
area should be 29.75"x19.75" for
6-fold (STYLE 3).
- For a 10.5"x10.5"x3" box, the artwork live area
should be 16.5"x16.5" (STYLE 1 or (STYLE
3).
- For a 20.5"x10.5"x1.25" box, the artwork live area
should be 23"x13" (STYLE 2).
We are printing your files and it is expected that you have checked all submitted files for color accuracy. A home printer can look very different than a CMYK driver printer. Additionally, we are using ink jet type printers that may shift in color, and change over time (a few months.) For prototype printing we are not responsible for color settings and/or inaccurate colors from either your end or ours. Manufacturing colors will be accurate to the file settings and are not a problem.
![]()
HOW TO CUT & MOUNT YOUR PRINT
![]() CUTTING:
CUTTING:
When you are ready to cut your print, use the crop
marks as your guide. Place a long straight
edge from one side of the print to the other, then
cut with a sharp utility blade (use caution as to
not cut yourself!) by sliding the blade the entire
length of the print while pressing the straight edge
firmly the entire time you are cutting. Leave
the edge of the paper to ensure that all crop marks
will be there for alignment. Repeat for all
sides. For boxes, you can leave the extra to
hold the print more securely.
![]() MOUNTING:
MOUNTING:
When you are ready to mount your print, we recommend
you
Order Spray Adhesive.
On the label side of the game board, you may wish to remove the thin plastic lamination by peeling it away with your fingernail. This is not necessary, however, it will help prevent any bubbles that may appear and it will help your print to adhere better to the board.
 Spray
the adhesive onto the back of the print following
the directions for the adhesive. Then mount on
the board, using 2
people if possible, aligning the all corners.
Once the print is on the board, place a blank piece
of paper over the board (to protect your print
surface), then rub the print firmly with a designers
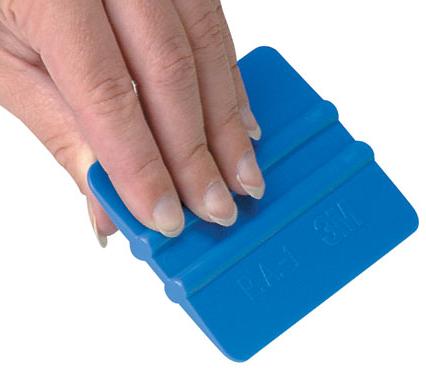
squeegee (see
picture to the right, click to see a larger image), or use a credit
card. Place a heavy, flat item on the board to
prevent warping from the glue. Allow the print to dry 1 day before
folding a game board. For boxes, you may fold
and wrap the print immediately.
Spray
the adhesive onto the back of the print following
the directions for the adhesive. Then mount on
the board, using 2
people if possible, aligning the all corners.
Once the print is on the board, place a blank piece
of paper over the board (to protect your print
surface), then rub the print firmly with a designers
squeegee (see
picture to the right, click to see a larger image), or use a credit
card. Place a heavy, flat item on the board to
prevent warping from the glue. Allow the print to dry 1 day before
folding a game board. For boxes, you may fold
and wrap the print immediately.
![]()
|
|
           |
Like us on Facebook:
